GENERAL
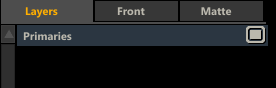
At the top of the Layer List there are three tabs: Layers, Front and Matte. The Front and Matte tabs apply to Layers that contain a texture and are discussed in more detail in the Texture menu in this chapter. By default the first tab - Layers is active. At the bottom of the Layer List there are various controls to manage Layers.
CREATE A LAYER
The Create button adds a new Layer. The first time SCRATCH creates two entries in the Layer List: Primary and Layer-1 .The Primary layer is the basic, primary grade for the current shot. The Primary grade is only visible in the Layers list, when there are other Layers. When there is only the primary grade, there is no need for it to be shown. 'Layer-1' is the default name created for the Layer.
Each new Layer is displayed on a separate line in the Layer List. The order of the Layers in the list determines the order in which they are applied. The Primary grade is at the top of the list, so it is applied first. Then each Layer is applied in turn down the list. You can modify this list, disable individual Layers, copy, and remove Layers, all from within the Layers Hierarchy List.
RENAME A LAYER
As the number of Layers on a shot increases, proper naming helps identify each Layer, and allows you to work more efficiently. To rename a Layer, select the Text Slate under the the Hierarchy List; type a new name; and press Enter.

CHANGING THE ORDER OF LAYERS
To move a Layer to a new location in the list, click on the Layer in the list to select it. Once the Layer is selected, click again and the Layer becomes attached to the cursor.You can now place the cursor over the new location in the list where you would like to drop the Layer. The new position is indicated by a horizontal white line. When you click down, the Layer is placed in position within the list as indicated by the line.
ACTIVATE AND DEACTIVATE A LAYER
Layers automatically become active once a Canvas is created or a Qualifier adjustment is made. An status of a Layer is indicated by the rightmost button in the Layer line in the List: when filled the Layer is active when empty the Layer is in-active.
Note: Layer activity status is taken into account when rendering the shots.

You can toggle the active state by clicking this button. An inactive Layer is not processed as part of the color grade though all of its information will remain.
Tip: You can deactivate all Layers for the entire Construct by turning off the View Layers button in the Player Settings menu. Primary grades will still be visible, but all Layers will not be processed. The Layers will still be present, but are simply switched off at a global level.
SOLO MODE
The Solo mode allows you to isolate the viewing of a Layer. The Active state is a setting for the Layer that is stored in the project database - the Solo mode is a temporary setting for the Project Session and used for review purposes.
Note: The Solo settings is disregarded when rendering the shot.
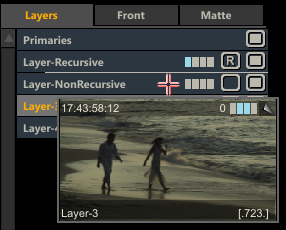
The Solo button at the bottom of the Layer List enabled the Solo mode: SCRATCH will only display the selected Layers in the Viewport. While in Solo mode you can select through the Layers in the List to view each separately.
When viewing the Front or Matte tab of the Layer List - each Layer has its own Solo button - the second button on the right. When in either of these tabs while the Solo mode is active - selecting a Layer will not automatically view it. From here you explicitly add / remove Layers from the view selection by clicking the Layer Solo button and toggling the 'S' on / off. that why you can quickly expand your selection.
LAYER BARCODE
Similar to the display of a thumbnails of a shot, a Layer is also shown with a Barcode. The bars represent the absence or presence on a Layer of:
- a primary grade
- a secondary grade
- a shape / canvas
- a qualifier, fill or mate
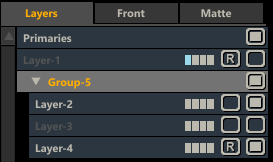
GROUPING LAYERS
You can select multiple Layers by holding the Ctrl key down. You can then Group these Layers together with the Group button. A group can be switched on- and off as a whole as well as moving its position within the complete list of Layers. You can also update the name of a group, making a large amount of Layers more manageable. A group can be un-linked by selecting the group and clicking the Un-Group button.
NEST
The Nest function moves all selected Layers onto a new Nest node and sets that node as the fill of a new Layer on the current node. If no particular Layer is selected the current node is replaced with a new Nest node with the current node as its input.
DELETE A LAYER
To remove a Layer - select it from the list and press the Delete button. Alternatively you can pick up the Layer and drop it on the Delete button.
COPY A LAYER
You can create a copy of a Layer for use within the same shot or on another shot. The copy retains all settings and animations from the original Layer. When you copy a Layer to a new shot and the Layer is using another shot as front or matte texture (see for details later in this chapter) - SCRATCH will automatically rewire the inputs of the Layer and Plug-in used. This means that when you e.g. use a plug-in as front on a Layer which in turn take the base shot as its input, SCRATCH will place that same setup on the new shot and use that as the input for the plug-in. The Paste Forward function, discussed in the previous chapter, exhibits this same behavior.
If you select and pick up a Layer from the list and drop it elsewhere in the list it is simply moved. To copy a Layer, select it while holding down the Quick Key: Alt. Note though that when you drop it on another shot it is always a copy whether you held the Alt key or not.
RESET A LAYER
Resetting a Layer returns the color grade values to their defaults. This does not remove any Canvas shapes, Texture adjustments or animations; it simply resets the color grade values.
To reset a Layer you must select it from the List and press the Reset button on the right side of the Player Menu Bar.
Note: If Primaries is selected in the List, and Reset is pressed, all Layers will be deleted and the primary grade is reset. This is a quick way of removing all grading from a shot.
LAYERS GRADING AND TEXTURE
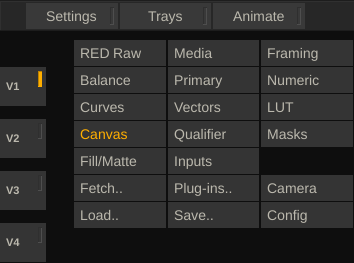
Although the Layer List is maintained in the floating Panel, most of the grading and compositing of individual Layers are controlled through the following menus in the main Matrix menu; Canvas, Qualifier, Masks, Texture and Camera. The first four menus represent the individual parts that make up each Layer and determine what portion of the image will be affected by the Layer. The Camera menu controls how the Layers are manipulated.
Note: The functions in these menus will apply to the selected Layer. When no Layer is selected or present, all controls in these menus are disabled.