GENERAL
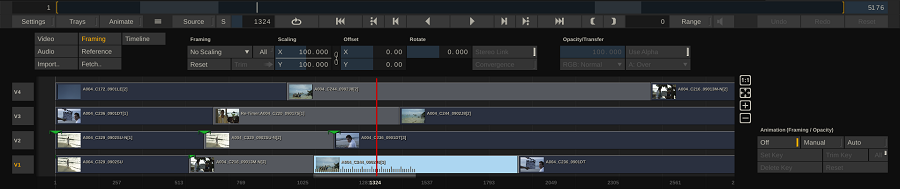
Through the Framing menu panel you can set the Shot Framing and Opacity / Transfer modes. When in the Framing menu - the far right of the Edit panel shows the standard Animation controls. For more information on animations - see Chapter - ColorFX.
SHOT FRAMING
Shot framing is processed as part of the timeline and as such, you can only adjust the framing of a shot when you are viewing it in the context of a timeline / Construct. Framing is made up of five parameters: X Scale, Y Scale, X Offset, Y Offset and Rotate. You can set these parameters manually by entering values into the Numerical Slates. These parameters can also be animated using the SCRATCH Animation tools.
FRAMING PULL-DOWN
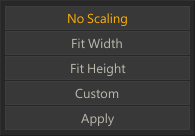
The Shot Framing pull-down is a quick and easy way to create the most common framing situations.
No Scaling
The shot is centered in the frame at a 1-to-1 pixel relationship. If the shot’s resolution is smaller than the working resolution of the Construct, you will see black around the edges of the frame. If the shot’s resolution is larger than the working resolution, the image will extend beyond the border of the frame.
Fit Width
The shot is scaled so that the width of the shot matches the width of the working resolution. Both X and Y axes are scaled equally to maintain the aspect ratio of the original shot.
Fit Height
The shot is scaled so that the height of the shot matches the height of the working resolution. Both X and Y axes are scaled equally to maintain the aspect ratio of the original shot.
Custom
Custom scaling allows you to specify the exact X and Y scaling you require by entering a value into the Numerical Slates.
Note: Any of the framing parameters can be adjusted at any time. If the values are changed, the framing pull-down automatically switches to Custom.
Apply | All
The Apply option on the framing pull-down is used in conjunction with the All button, allowing you to apply the current framing values to all shots in the timeline.
To use Apply , set the framing on the current shot to the desired settings by using either the framing pull-down, or by manually setting the framing parameters. Activate the All button and then select Apply from the framing pull-down. The current framing values are applied to all shots in the current timeline.
Tip: This is a very quick way to bring a group of shots with mixed resolution all to the same viewing size. For example, if you have full-resolution elements that are 2048 x 1556 and mix those with low-resolution offline images that are 512 x 389, you can bring the low-resolution shots up to match the full-resolution shots. This is done by setting the framing controls to Fit Width, then activating All and selecting Apply. Now all the shots will be the same size within the Construct; shots will not pop from one size to the other while playing back.
TRIM
The Trim option allows you to copy the adjustments to the scaling forward to all clips on the Edit after the current one. Only the adjustment (delta) will be applied forward, not the exact framing.
RESET
The Reset option will restore the default framing settings for the shot. The Reset will leave any of the other Source Transform settings untouched. For that you use the Reset button on the main menu bar of the Player.
STEREO OPTIONS
The Link and Convergence options for Stereo media are discussed in more detail in Chapter - ColorFX, the section on Input Transform.
OPACITY AND TRANSFER MODE
Controls to set the opacity level of the shot, toggle whether to use the shot's alpha channel and set the RGB and alpha transfer modes. These settings only apply to shots being used on sub-tracks. For shots on the main timeline track these settings have no meaning and as such the controls are disabled. These controls are also available from the Matrix toolset. The different transfer modes are described in detail in Chapter - Layers.