GENERAL
The Audio Panel is displayed using the Mixer button on the Viewport toolbar or by using Quick Key: Ctrl + 7. All the functions of Player Audio Panel are split up over 5 tabs:
- Mixer; volume control
- Waveform; settings audio slip and using the auto-sync option
- Output; device selection and channel mappings
- Ambisonic; dealing with 360 audio.
- Capture; handling incoming audio (for live streaming).
MIXER
SCRATCH supports a maximum of 16 audio channels. You can set the audio level for each of the channels with the slider control next to it. The VU meter show the level when playing.
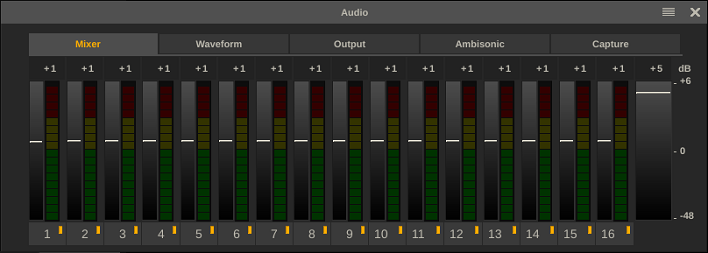
With the buttons underneath the sliders you can mute a channel. With the Master Volume slider at the far right you manage the overall audio level. Changing this will change the individual channels volume proportionally. The Master Volume is available on all tabs.
WAVEFORM
This tab displays a waveform of the current audio linked to the timeline or current shot (see Chapter - The Construct or Chapter - The Editor on how to load and link audio). The red marker indicates the current play position. With the numeric control or slider control above the waveform you can set the detail level; the numeric value represents the number of milliseconds of audio displayed. The waveform only includes active channels.
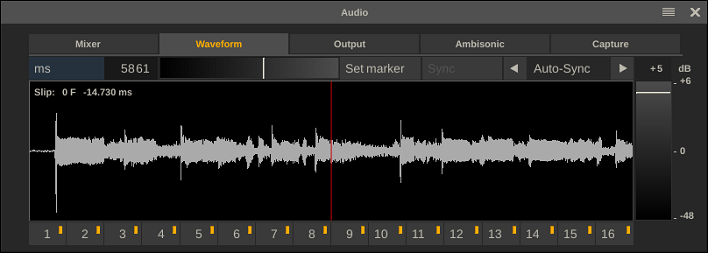
To set the audio slip you click inside the waveform panel and drag the waveform left or right. Alternatively you can use the Auto-Sync options. Selecting the right or left arrow-button will search for the next or previous peak in the waveform and update the slip. This can be used for automatic clapper detection.
Alternatively by selecting the Auto-Sync buttons while holding down the Control-key will slip the in-point of the current shot - rather than the audio. When SCRATCH finds a peak it calculates the number of frames from the current position and updates the in-point accordingly. Any remaining milliseconds are set as audio slip.
OUTPUT
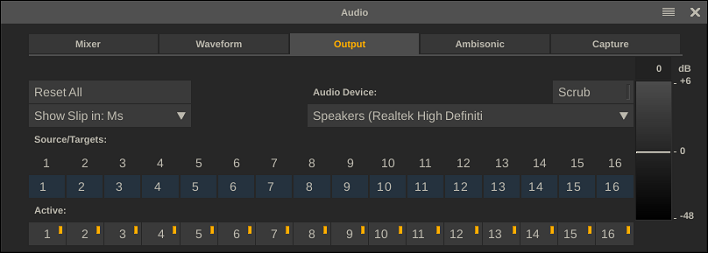
Reset All
Reset all channel mappings and volume controls to their default values.
Show Slip
Project wide setting whether an audio slips in SCRATCH are displayed in milliseconds or in (video) frames.
Channel Source/Target Mappings
You can map every channel in the source file to any channel on the output device. However, you can not combine multiple source channels into one target channel.
Audio Device
Select one of the available audio devices on the system; either a regular audio device or embed audio with your SDI output signal.
Scrub
Enable / disable audio scrubbing when you shuttle through the timeline. Note that not all devices might allow audio scrubbing - e.g. this feature might not be available for some SDI boards when embedding audio in the SDI signal.
AMBISONIC
Through this panel you can manage ambisonic / spatial 360 audio sources that you linked to a shot or timeline. Managing audio sources is discussed in Chapter - The Editor. The options in this panel are also discussed in more detail in that chapter in the paragraph on audio.
CAPTURE
Through this tab you can select a device for capturing audio that can be combined with the current playback and used for streaming out (see the section on Collaboration in the Chapter - Customizing). To the left on the tab are the controls to select the Device and the Format to capture the audio. When you enable the Audio Capture button, the capture actually starts. With the Delay numeric control you can set the number of milliseconds to delay the audio to make it sync with the video.
To the right of the panel are a number of controls that allow you to convert the captured audio into Ambisonic audio. For this the captured audio needs at least 4 channels of audio. The Enable button start the conversion of the captured audio into Ambisonic audio. The Orientation and Rotation determine how to interpret the captured audio 3 / multidimensional, while the remaining controls are used to fine-tune the audio quality in the conversion.