GENERAL
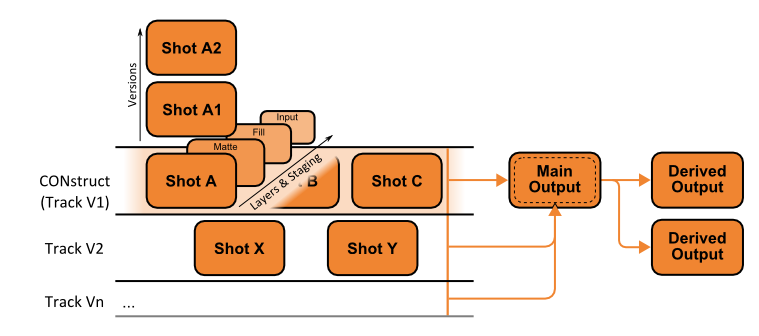
To be able to navigate efficiently between different modules, it is important to get fully acquainted with the navigation model. For this it is you should keep in mind the different dimensions of a shot and a timeline as displayed in the diagram below.
ENTERING THE PLAYER
There are different ways of entering the Player: by clicking one of the player tabs (Edit / ColorFX), by clicking a thumbnail, selecting an option in the Command menu or by using a Quick Key or panel shortcut. Depending on the method you enter the player either with a timeline or a single shot.
TIMELINE
If you click the Edit or ColorFX tabs - either while in the Construct- or Render tab - you open the player with the current selected timeline. The playback cursor starts at the beginning of whichever slot is currently selected in the timeline. If you click on a version shot (thumbnail) in a timeline, you also enter the Player with the full timeline on the selected shot's (slot) position combined with selecting the version. If you start from a sub-timeline (video Track) you also enter the player with the full (multi-layer) timeline plus making the (sub)video track active.
SINGLE SHOT
To load an individual shot into the Player, you either use the Command menu option Play Single Shot or Compare Shots or use Quick Key: Esc while hoovering over the thumbnail. This will automatically switch the player into Source mode - discussed earlier in this chapter - and shows the entire shot. Any in- and out-point that were set for the shot are applied as a Range.
The Player can also be started as a stand alone module by opening a shot directly from the operating system. Details of this are discussed at the end of this chapter - in the paragraph on the file-based Player.
OUTPUT NODE
Entering the Player with an Output node is similar as entering it with the Construct - only the output node is selected and can be worked on directly (grade / comp). If you click the play icon of any node in the output tree in the Render tab, the Player opens with the full timeline loaded but with the output node selected. You can switch back to the actual Timeline by selecting the Version Stack, discussed later in this chapter.
NAVIGATION TOOLS
Depending on how you entered the Player you have full access to all underlying elements: timeline shots on the main and sub-tracks, all versions of shots, inputs of a composite shot, shots in the Staging area of a shot, all (derived) output nodes of the main- and sub-tracks and different reference and project library shots in the trays. The Player has multiple tools to navigate to these different elements for review and update by themselves or in context.
- Track Selector; switch between different video tracks in your multi-layered timeline.
- Version Stack; navigate, add / remove versions or change the order of versions of a shot in the Timeline.
- Node Tree stack; navigate the composition elements of the current shot down - this has two views: the tree-view and the node-view.
- Staging Stack; navigate, fetch and add composite elements to a shot's local holding area.
- Output Stack; navigate the (derived) output nodes of the current timeline.
- Layer List; select, add, (re)move shot (grading) layers.
- Perspective View; view a 3D space schematic of all layers and the camera position(s) in perspective.
- Trays; Navigate the project-wide holding areas, use for copying grades or as reference for the current timeline. As well as the system gallery items.
Each of these tools are discussed in more detail in the remainder of this paragraph. Other navigational elements that were already discussed in the previous paragraph are:
- Mini Timeline for navigating the timeline / shot frame position.
- Proxy Timeline for navigating the timeline shot position graphically.
- Previous / Next controls in the View Port Control Bar for navigating prior selected timeline positions and composite elements.
- View Port Tool Bar for selecting a specific context view.
- Source mode to view the current shot or composite element including its in / out handles.
As an indicator of your present location and dimension in the Player, SCRATCH uses a number of color-codes:
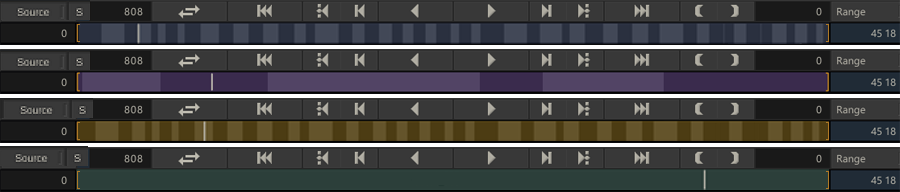
- Blue indicates that you are working on the current shot on the first track of the timeline.
- Purple indicates that you are working on the current shot on a sub-track.
- Yellow indicates that you are working on an output node or viewing the rendered media of the main output (see the paragraph of Processing and Caching later in this chapter).
- Green indicates that you are working on composite element or that you switched into Source-mode for the the current timeline shot.
Note: The color code indicates on which node you are actually WORKING. This does NOT necessarily has to be the same shot that you are VIEWING. The ViewPort e.g. allows you to select the Output node or lock to a Parent node to be able to work on the active node in its context.
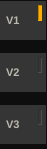
TRACK SELECTOR
The track selectors are available on the far left side of the Matrix and Editor menu pages. Note that in the Matrix the tracks are shown top down with the main - most prominent - track at the top while in the Editor the tracks are displayed bottom up - with the main track at the bottom as is more common in editors. You can select a different track by clicking on it. Selecting a different track means that the current shot on that track becomes the active shot. Note that if at the current position in the timeline the track does not contain any shots, it is displayed disabled.
If there are more tracks present than fit on the screen you can pan the track selector up and down by holding down the space bar while dragging the selector up or down. For more details on creating new tracks or removing tracks - see Chapter - The Editor.
SHOT STACKS
For quick navigating through the different dimensions of timelines and
shots, you can use the Shot Stacks which are available with a right Swipe
action or using Quick Key: W. The tab buttons at the bottom of the panel give access to various
navigation tools: Version Stack, Source Stack, Staging Stack, Output
Stack as well as the Metadata Stack which was discussed
earlier in the chapter.
VERSION STACK
The Version Stack shows you all the shots in the current slot where the bottom shot is part of the timeline.
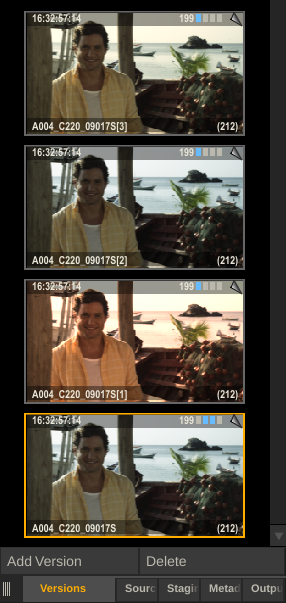
You can create a versions of the current selected shot by using the Add Version button or alternatively use the Delete Button to remove a selected version. When you select a version shot it becomes active in the Viewport. It also becomes the active node in the timeline for the duration of the Player session or until you select a version shot in another slot. This way you can view how a version looks in the timeline. To permanently make a version the timeline shot you can drag-drop the version shot to the bottom position in the version stack.
NODE TREE AND STAGING STACK
The Node Tree shows all the inputs, layers, fills and mattes used
in the current (composite) shot and allows you to navigate and manage each of those elements. When selecting one of the elements in the Node Tree, the Player automatically switches to Source mode. To revert back to the Main shot either click the top node in the Tree View or select the Version Stack. You can expand the Node Tree to uncover more of its content by using the gripper at the left bottom.
The Node Tree has two views between which you can toggle by using the icon buttons at the bottom left of the panel:
- Tree View, which shows the hierarchy of all the input nodes into the composite shot by indentation. The type of element is indicated by the icon and
text left of the name of the item; a square for an input shot, an F icon for a Layer fill shot and an M icon
for shot used as matte in a Layer. You can collapse (part of) the tree by
using the Arrow buttons to the left of each element. You can drag and drop items onto the Sources Stack to replace elements. The Delete button will remove the current selected input node from the composite. Or, in case the selected node is the top shot and it has inputs
- Structure View, which gives a full schematic of the composite shot and all of its elements. The Structure View offers additional functions for adding and replacing elements and is discussed in more detail later in this chapter.
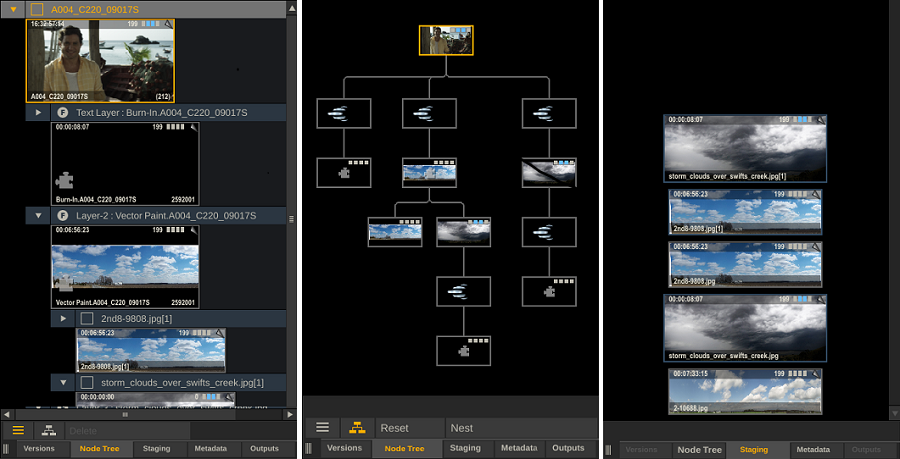
The Staging Stack displaying a shot's holding area for composite elements. From here you can pick up / drag items to be used as
elements in your composite.
OUTPUT STACK
The Output Stack contains a all (derived) outputs that have been created in the Render tab for the current timeline, including the Main Output. You can select an output to open it in the player and adjust its settings or add additional grading. The Output Stack is a simple list that does not show the hierarchy between output nodes. The Render tab shows the full output tree and is discussed in a later chapter.
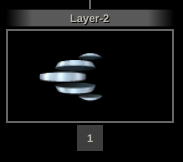
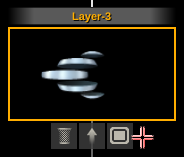
LAYER LIST
With the Layers toolset you can create unlimited layers on top of a shot. Each layer can have its own color grade, shape, softness, color qualifier, animation, tracking and fill / matte combination.
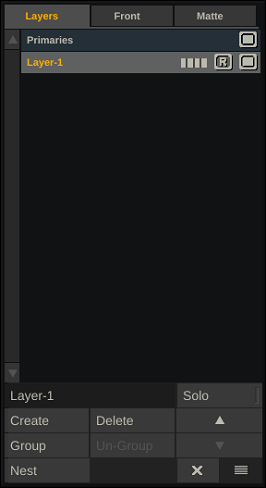
Selecting a layer will make it the active layer. All the controls in the matrix menus then apply to the grade, fill or matte of that layer.
The Layer List can be toggled on/off by swiping left or through the Layers button in the top Player menu bar. Using the gripper in the right bottom corner of the panel you can drag the to any position in the View Port, effectively making it a floating panel. You can dock the panel again by dragging it to the left side of the View Port.

Layers are discussed in detail in Chapter - Layers.
STRUCTURE VIEW
GENERAL
The Structure View is a tool that displays the full hierarchy of a composition shot and allows for editing its components. The Structure View is part of the Node Tree stack which was discussed earlier.
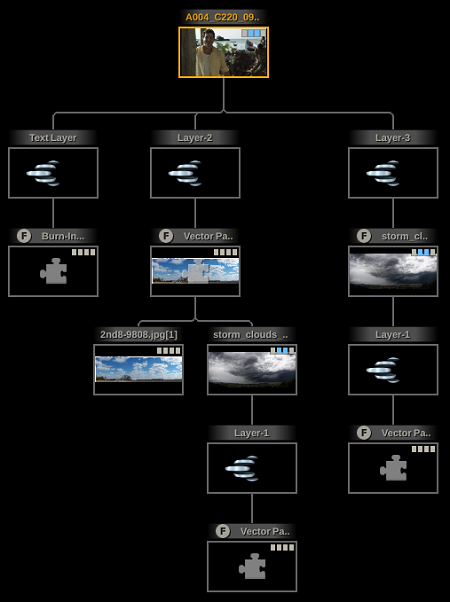
The Structure View shows the schematic of layers and nodes that make up the selected timeline or version shot, consisting of:
- The primary shot as the top node.
- All direct inputs and plug-ins used.
- All Layers. If a layer has a fill or matte input this is indicated using the F and M icons, similar to the Sources Stack. Note that in the Player Configuration settings you can optionally switch off the display of Layers in the view and only include nodes or only include layers that have a matte or fill as input.
You can re-size and pan the view in the same way you scale and pan an image in the View Port, as discussed earlier in this chapter. You can limit the number of elements shown in the view through the Player User Preference: do not show layer, show only layers with a fill/matte, show all layers.
INTERACTIONS
If you select an element in the Structure view by clicking it, the view closes and the Player loads the selected shot or selected the Layer that was clicked. When opening the view the selected element is highlighted as well as all the connector lines from the top-node to that element. If there are multiple instances of that element all of them are highlighted as well as all connector paths.
Each element that has one or more child elements below it has the option to collapse / expand the sub-tree below by clicking the arrow button below the element. When collapsed the button will tell you the number of items that are hidden. Clicking the button again will expand the sub-tree again. The current state of a Structure View is stored with the composite / top shot.
When you hover over an element a popup menu displays that allows you -depending on the element type - to activate / deactivate the it using the A button or to delete it using the trash-bin icon button.
You can add or replace elements directly in the Structure view by dragging those elements - either from elsewhere in the Structure View, from the Staging stack or Layers list of another shot - and dropping them on an element in the Structure View. While dragging an item and hovering above an element in the Structure View a circular menu is shown across that element with one or more options. You either select one of those options or click directly on the element - using the default option that is highlighted in the menu.

Possible actions are: adding or replacing an input of a plug-in, adding a shot as front or matte to a Layer, adding or moving a Layer.
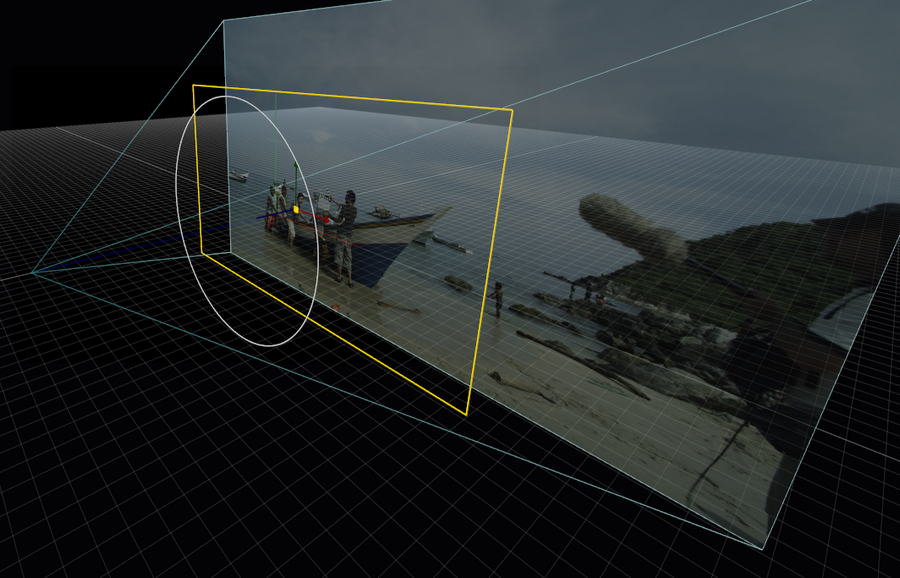
PERSPECTIVE VIEW
The Perspective view offers a 3D schematic view of your scene: Camera, Layers and Back plane. You can drag and rotate the view into any angle desired. See Chapter - Layers, the paragraph on the Camera menu for more details on manipulating your scene and the different possible (perspective) views. Note that the presence of at least one Layer is required for the Perspective view to be available.
TRAYS
As mentioned in the previous chapter, there are two types of Trays: Project Trays and Gallery Trays. Project Trays hold shot references and the scope of a Project Tray is the current project. Gallery Trays only hold the grade and composite meta-data but no link of actual media data - except for a proxy image. Gallery items are stored in jpeg files outside the project database and in the user folder and as such are available from all projects.

All of the Tray functionality is discussed in detail in Chapter - ColorFX.
TIMELINE
In the Player, the Project Trays always contains a dynamically created Timeline Tray. This Tray holds references to each clip in the timeline. There where the Proxy Timeline can be used for navigation - this Timeline Tray provides a view that case be sorted and used to quickly select or grade whole sections of your timeline. You can quickly select the current shot in the Timeline Tray by using Quick Key: T.
SYSTEM TRAYS
Next to Project and Gallery Trays SCRATCH offers the option for a third type of Tray: the System Tray. The System Tray works identical as the Gallery Tray but the gallery items in it are not stored with a single user but are available for any user using SCRATCH on the particular system. More so - when mapping the SCRATCH Users folder to a network drive you can share the System Tray between multiple SCRATCH systems. You enable the System Tray through the Advanced tab of the System Settings dialog - available from the System Settings menu in the Startup screen (see Chapter - The Startup Screen).