GENERAL
The Burn-in plug-in allows the creation of Text- and/or Guide overlays. The text can be plain text, codes that translate to metadata properties of the underlying shot or an external subtitle file. All text are displayed and rendered continuously on all frames or you can set flash frames to only include the text at the start and/or at the end of the shot. The plug-in has four tabs with controls: Text, Global, Guides and Flash.
MANAGING TEXT BLOCKS
You can add as many as 32 separate text-blocks on a single Text-Frame. The left side of the Text-Frame menu panel allows you to create new text-blocks, scroll through the existing blocks or remove a block.

New
Creates a new text-block, after / in front of the current selected block.
Left / Right Arrows
Scroll through the first, previous, next or last text-block. The numeric display in the middle shows the index of the current block.
Up / Down Arrows
Change the position of the current text-block. The position also determines the render order of the blocks.
Text-Slate
Here you enter the text to be displayed. This can be plain text or metadata-codes similar to those used in the file-naming scheme for Output nodes as explained in Chapter 4 - The Construct. Possible codes are #sname or #stc, which translate into the name and timecode of the Text-Frame's underlying shot (if available). As an example; when a Text-Frame is placed on an Output node, the text 'current shot: #sname' might display as 'current shot: myShot'. Chapter 4 - The Construct contains a complete list of available codes that can be used in the File-Naming scheme and/or the Text-Frame.
Insert Metadata
This drop down button allows you to select a shot metadata code to be inserted in the current text block. The available codes were discussed in Chapter 4 - The Construct in relation to the file-naming scheme. A selected code will be inserted with a # prefix.
Use Format Tags: Bold, Italic, Underline and Color
You can add format tags inside to format part of the text in the text block. Use <b>..</b> for bold, <i>..</i> for italic, <u>..</u> for underline and optionally add <font color="#rrggbb">..</font> to specify a color.
TEXT BLOCK PROPERTIES
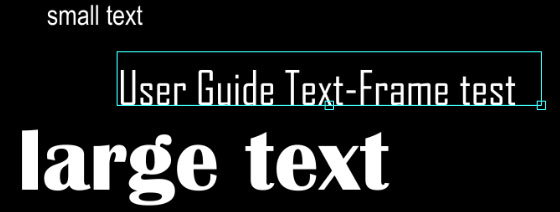
All text-blocks are displayed in the Viewport image. The current text-block is displayed in a textbox-overlay. You can change the position of a textbox directly by clicking on it and dragging it while holding the mouse button down. Dragging the textbox from one of the two hotspots on the bottom border will alter the size of the textbox. Dragging the center point will only alter the size of the textbox, while dragging the corner point will also adjust the character size.
Alternatively from adjusting the position of a textbox directly you can also adjust the Position (X and Y values) and Dimension (Width and Points) controls. The Points control directly affects the character size of the text, the others only the position and dimensions of the textbox.
Font Select
This button opens a font-selection dialog, listing all available fonts.
Size and Position
Set the point size, X and Y position of the text block on the image and the width of the text block.
Alignment
This sets the alignment of the text within the textbox.
Line Spacing
Adjust the size of the spacing between lines that is used when the text has multiple lines.
L to R
Right to Left setting: this will right align the text-slate and will set the default burn-in alignment for new text items to Right. This is meant for bi-directional languages like Arabic and Hebrew. Please note that to be able to display text in those languages (or other non-western languages such as Chinese, Japanese and Korean) you must select a suitable font.
Fill Color and Opacity
Use the color-selection panel to pick a color.
Outline
Use color selection to pick a color, set the line size for the outline and pick a draw mode: over or under.
Apply To
Set this option to Current Item Only or to ALL items to apply the alignment, fill and outline adjustments to the current or to all text blocks.
GLOBAL TAB
The Global tab has a number of settings that apply to all text blocks and functions to include an external subtitle file.

Global Offset
The X and Y values are added to the position of all text-blocks in the Text-Frame.
Snap to Grid
When this option is enabled, the position of any text-block in the Text-Frame automatically adjusts to align with a virtual grid. The spacing of the grid points are determined with the X- and Y-values that can be entered below the Snap button..
SUBTITLES
The Text-Frame has the option to read subtitles from an external file and displaying them at the correct timecode. The Load button on the Global tab of the Text-Frame allows you to load either a *.stl or *.str formatted subtitle file. Note that SCRATCH by default will interpret the file in UTF-8 format.
After selecting a file, adding the code #subtitle to a text-block will display the subtitle. The two formats supported are both plain text formats. The *.srt format is described on http://srt-subtitles.com/. The *.stl format has different sub-formats, however SCRATCH supports only the text variant and not the binary one:
....
00:00:56:06 , 00:01:00:16 , first subtitle with in- and out-timecodes
00:01:00:21 , 00:01:05:24 , second subtitle | the pipe character represents a line-break
.....
Note: Any '$' tagged meta-data items at the beginning of an stl files are not processed by SCRATCH.
SCRATCH will pick up on any format tags for color, bold, italic and underlined text when encountering the tags specified earlier in this section. The Slip control on the Global tab of the Text-Frame allows you to adjust the timing of the subtitle display. The Slip value is added to the timecodes in the subtitle file.
GUIDES TAB
You can use one of the predefined guides from the Guides drop-down button or create a custom guide by using the Left, Right, Top and Bottom numerical buttons.

A guide is made up of several parts, or Cages: The base guide area, blanking, action and text safe regions. Each of these Cages can be customized separately from within the Guides tab. Each of the cages can have its own color and (relative) size. For the Blanking color you can also set the transparency level.
FLASH TAB
By setting flash frame options you can display the text and guides only at the start and/or end of a shot.

Flash Frames
This option switches the Flash Frame option on or off.
Start
Sets the number of frames at the start of a clip on which the texts are rendered.
End
Sets the number of frames at the end of a clip on which the texts are rendered.
Flash Guides
This option determines if any Guides that are set are also flashed or rendered on all frames.