GENERAL
The User Interface within SCRATCH lets you deal with the most on a daily basis. So, creating a working environment tuned to your needs not only makes you more productive, but also makes the SCRATCH software feel like part of your facility.
STARTUP LOGO
Use the Startup log setting in the System Settings menu of the Startup screen to show your own logo in the SCRATCH Startup screen and as the output for the Dual Head or SDI monitor, if available, whenever you are in the Startup Screen or Construct. Note that this logo can include an alpha channel for transparency.
INTERFACE FONT AND COLOR
The color of each element in the SCRATCH User Interface can be modified, as well as the font used throughout the interface. These modifications are saved for each individual User.
To modify the User Interface, you must first enter a Project in SCRATCH. From either the Construct or Player, press the Quick Key: Control + U to open the Interface Settings window.
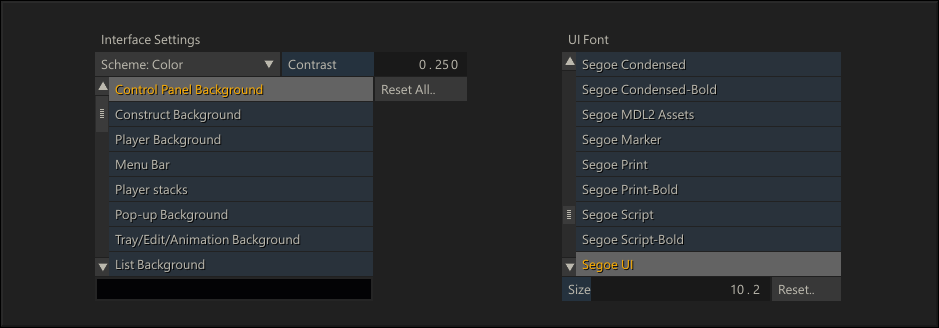
The overall SCHEME is listed on the pull-down in the upper-left corner.
There are three options: Color, Mono and Custom. Color and Mono are preset schemes, but the Custom option allows you to modify every aspect of the interface.
Note: You are only able to modify the interface if Custom is selected.
There is also an overall CONTRAST adjustment, which adds more or less contrast to the overall scheme; the lower the number, the lower the overall contrast of the interface.
The list on the left side contains all the different User Interface elements. To modify an element, select it from the list and then click on the Color Chip at the bottom of the list.
This opens the Color Selection Palette, where you can choose the new color. Changes you make to the interface are applied immediately, while working in the Color Selection Palette. So, you can gauge what the change looks like, and continue to make modifications. Once you are happy with the color, click OK, or swipe off the screen. If you want to return back to the previous value, click CANCEL.
To reset all elements back to their default color, click on the RESET ALL button.
On the right side, you can choose a font to use for the interface. The buttons across the top allow you to select a separate font for the DEFAULT, SMALL and FIXED representations. SMALL is the text that appears on thumbnails in the Construct; FIXED is the text that appears in Numerical Timecode Fields; and DEFAULT is the text that appears everywhere else. Each can be reset using the RESET button on the right side.
Choose a type, and then choose a font from the list. You can also change the overall size of the font using the Size Numerical Slate at the bottom of the list. The changes occur immediately.