GENERAL
You can use the Tracker in SCRATCH to lock a Layer animation to an object within the shot. The Tracker uses a sample of pixels from the image or the full shape, and looks for that same group of pixels on the next frame. Once found, the difference in position between the two frames is used to control the position, scale, rotation and deformation of the Layer. To track a Canvas, click the Open Tracker button to the right of the Canvas menu - above the Animation section. This opens the Tracking menu. To apply the track information once done, click and accept the Close Tracker button at the right top of the menu.
The Tracker is also used for stabilizing media. On the right of the Setup menu you find the Stabilize button which also open the Tracker menu. For Stabilizing the Tracker menu has different options that for canvas tracking. To apply the stabilize information, click and accept the Close Stabilize button.

When the Tracking menu opens, all other Layers are hidden. The Player automatically switches into Source Mode and the image switches back to its native size if any Shot Framing has been added.
TRACKER TYPES
There are different track options available from the Track option list.
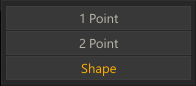
Point tracker
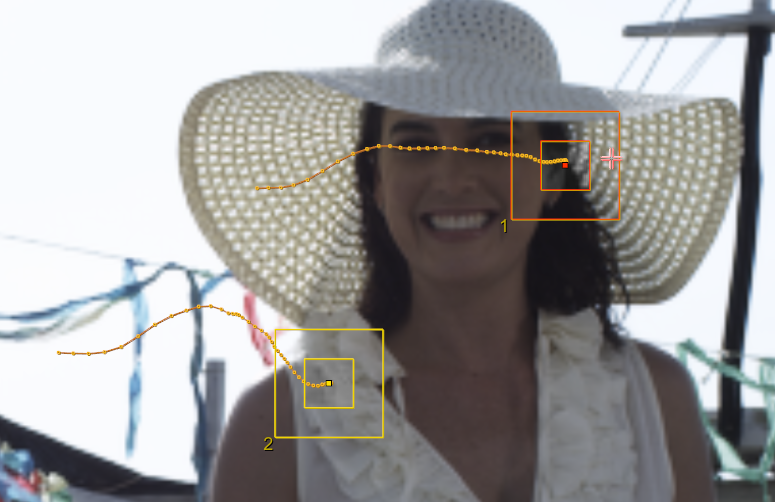
A point tracker consists of three parts: a position point, a sample region, and a search region.

Position Point
The position point is represented by the cross-hair at the center of the tracker. This is the X and Y position of the tracker, which is used to determine the transforms of the Layer. When you place the cursor over the position point, the entire tracker will highlight, indicating you can move the tracker by clicking on the position point to drag the tracker to a new location on the screen.
Sample Region
The inner box represents the sample region. The pixels within this box are used as the initial sample that is searched for subsequent frames. To resize the sample region, place the cursor over the sample box. It will highlight, and you can click and drag the sample box to change its size.
Search Region
The outer box represents the search region. This is the area within the tracker that will search subsequent frames for a match of the sampled pixels. To resize the search region, place the cursor over the search box. It will highlight and you can click and drag the search box to change its size.
2 point tracker
While a single tracker allows you to set X and Y Translation values for the Canvas, with two trackers, the Canvas is also animated in X and Y Scale. The change in distance between the two trackers determines the X and Y Scale offset.
Tip: When working with 2 point trackers, try to choose tracking points that are as far apart as possible. A larger distance between trackers will yield better results.
Shape tracker
A Shape Tracker evaluates the whole Layer canvas and automatically calculates multiple feature points in the shape. Each of these feature points are tracked independently from one frame to the next and the results are combined to calculate the position, scale, rotation and deformation of the shape.
SETTING UP A TRACK
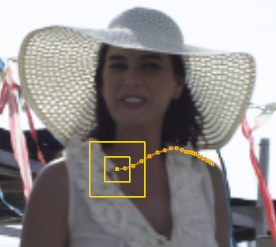
Show trace
When Show Trace is active, the path connecting each keyframe in the track is shown in the Viewport. This is helpful for finding errors in the tracking, or generally visualizing the tracking path. This only applies to the Point Tracker, the Shape Tracker will just show the single overlay of the shape.
Pre-tracking
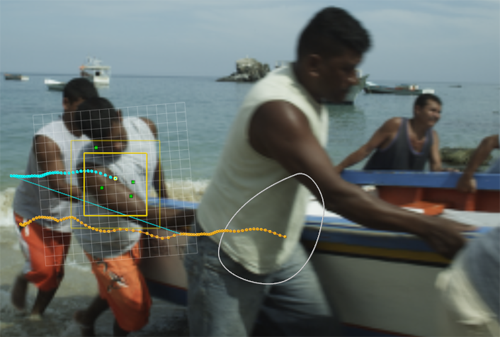
As you position trackers on the image, SCRATCH will perform the tracking on the next frames in the shot and show you the results as a set of cross-hairs. This only applies to the Point Tracker, the Shape Tracker initializes by calculating its feature point set.
Pre-tracking can be used to determine the quality of a tracking point. If the pre-tracked information does not follow an expected path, the sample area may not be ideal. In this case, you can relocate the tracker to another sample area, or adjust the sample and/or search regions. A new set of pre-track information is generated based on the new settings.You can continue in this way until a satisfactory sample area is found.
To adjust the number of frames in the pre-track, change the Pre-track Numerical Slate value.
Tip: When choosing a tracking point, areas that contain high contrast and more distinct detail produce the best tracking results. In the case of fast motion, you may have to expand the search region so that the Tracker looks at a larger portion of the image for a match to the sample region.
PERFORM A TRACK
There are a number of controls to control a track, all controls are mirrored and can also be performed in a reversed direction. Once the tracking information is processed, you can close the tracking menu using the Close Tracker button. This returns you to the Canvas menu.
 |
Start the actual track
|
 |
Delete the current selected individual tacking point.
You can also use the Quick Key: Backspace to remove a tracking point.
|
 |
Step to the next tracking point.
|
AXIS TRANSFORMATION
These three buttons (Translate, Scale and Rotate) determine what Transformations will be key framed by the tracker. As mentioned earlier a one point track only has the Translate option. A two point track can also calculate scale and rotation. The shape tracker can also apply a deformation to the shape itself. Deactivating any of the buttons removes that transformation from the tracking results.
Inverse
You can invert the tracking information by activating the Inverse button. All tracking information will be inverted. This can be useful for advanced shot stabilization. This option is only available for the Point Trackers.
VERTEX TRANSFORMATION
Deform
Instead of tracking and then moving a shape the new tracker actually deforms the shape to match the changes occurring to the object underneath perfectly.
Vertices
The Vertices button can be used to replace contents on moving objects for example license plates and televisions.
STABILIZE
When entering that tracker menu for stabilizing the Vertex transformation options are not available but a 3 new options become available.
Centre
When enabled SCRATCH will centre the X and Y-transformation of the track. Not available for 360 media stabilizing.
Fill Frame
When enabled SCRATCH will add a scaling to the shot so that the shot always displays a full frame without borders from the X and Y-offsets from the track. Not available for 360 media stabilizing.
Apply To
This option determines how the tracker information is applied for stabilizing.
- Layer; a new layer is created and the (inverted) tracker data is applied on the canvas. The projection mode of the layer is set to 'Map On Canvas'. The advantage of applying stabilizing this way is that it leaves the Framing controls free for pure timeline scaling and you can easily create additional motion on top of the stabilize by grouping the stabilize layer and adding (e.g. a camera pan) motion to that group.
- Framing; the tracker data is applied directly to the framing controls of the shot (see the Setup menu).
Note that when selecting the Stabilize option for 360 media, the stabilize is always applied to the yaw, pitch and roll transformations of the shot. In that case, the Apply To option is not available.
CHANGE SOURCE
By clicking Fetch in the menu and dragging a new source node into the proxy widget, the tracker will use the new node to perform a track. After closing the tracker the resulting tracking data will be applied to the original shot. Use the Clear Source button to restore to original tracking source.
TRACK OFFSET
The position of a Point Tracker can be manually adjusted:
- When moving the Tracker to a new position while holding Quick Key: Control, the resulting animation channel will include the additional offset. When not holding the Control-key while re-positioning, the tracker will just continue from the new position and the animation channel will not include the offset.You can use this when the tracked object is obstructed.
- To change the position of an existing track point, hold down Quick Key: Shift and drag the point to its new position. You can use this to manually adjust the key frame.
When the search box of a (shape) tracker is repositioned during a track using the Quick Key: Control - the motion path is not affected and the object's offset path is shown in blue.
COLOR CHANNELS AND FILTER
With the R, G and B buttons you can selectively track on individual color channels. The LPF button adds a Low Pass Filter option to the tracker to help with tracking on images with high-frequency noise such as film-grain.
IMPORTING AND EXPORTING TRACK DATA
When in the Tracker menu you can use the general Save and Load buttons in the lower left corner of the Matrix menu to save the current track data or load external tracker data. Tracking data is exported or imported in a comma separated file format. A one point track has three columns: key-frame number, x-value, y-value. A two point track has two additional columns, the x-value and y-value of the second point.
0,861.000000,675.000000,704.000000,1008.000000
1,861.103638,673.776978,705.754028,1009.121826
2,860.858948,673.603821,706.700073,1009.195129
3,860.802368,672.376343,707.786072,1009.108704
......
Note: This only applies to point tracker - data of a shape tracker can not be saved or loaded externally.
IMPORTING FROM MOCHA
When you have the Mocha Pro tracker software from Imagineer Software Ltd at your disposal you can use its tracking data in SCRATCH by using the 'Assimilate SCRATCH Corner Pin' format. Scratch can import that data using either the clipboard or a file. When the shape tracker is selected SCRATCH will recognize Mocha clipboard data and enable the 'Paste from Mocha' (CTRL+V). Alternatively you can use the generic Load to import a data from file.
TRIMMING THE CANVAS POSITION
After tracking is complete the Canvas may not line up exactly with the intended location on the screen. In this situation, you can adjust all the key frames by the same offset amount, using the Trim Key animation button in conjunction with the All button. By using this combination, all translation curves will be offset by the amount that you moved the Canvas. The Trim Key button is covered in the ANIMATION section of Chapter 7 – The Matrix.